Welcome to “Handmade Hero Notes”, the book where we follow the footsteps of Handmade Hero in making the complete game from scratch, with no external libraries. If you'd like to follow along, preorder the game on handmadehero.org, and you will receive access to the GitHub repository, containing complete source code (tagged day-by-day) as well as a variety of other useful resources.
Last time, we achieved instantaneous live code editing, allowing us to edit C code live, and recompile it without having to exit the program. That's already a great tool to help us on our journey.
Today we'll do something even cooler and more unique. At the very least, the technique you are about to learn is something that you don't often hear about; it has no big drawbacks and, as you will see, only great benefits.
Today we'll achieve looped live code editing.
(Top)
1 Introduce the “Player”
1.1 Adding Jumping
2 Define the Objective
2.1 The Problem
2.2 Do It Like the Musicians Do
3 Implement Live Loop
3.1 Introduce the Platform State
3.2 Outline Usage
3.3 Input Recording
3.4 Input Playback
4 Loop the Game State
5 Fix the “Jump” Code
6 Further Tweaks
6.1 Make Game Window Topmost
6.2 Make Game Window Semitransparent
7 Recap
8 Side Considerations
8.1 Disable Sound
9 Navigation
Introduce the “Player”
To better illustrate our objectives, let's add more complexity to our “gameplay” code. To be fair, we didn't start working on the game proper just yet, we want to finish cleaning up the platform layer first so that not to return to it for a great while. What we have in our platform-independent layer right now—a simple gradient and a sine wave sound—only serve to flesh out our platform layer.
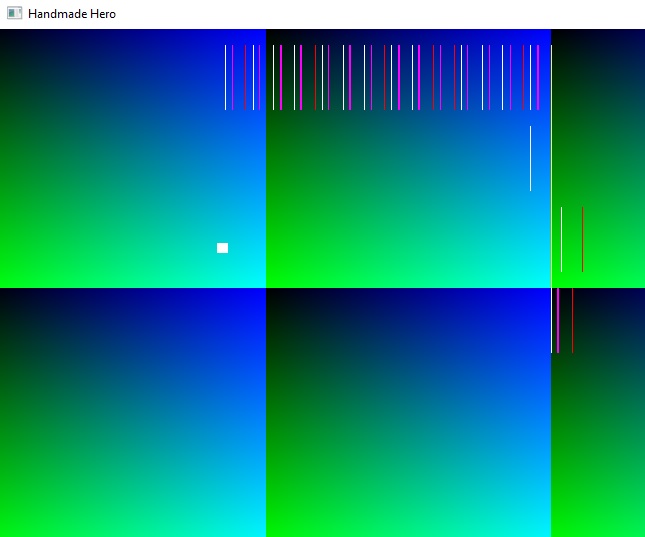
Today's addition will be of no exception. We'll try a simulate the most simple “player” you can imagine: a small white square which can move based on the user's input. This will be completely throwaway code, something that you can write fast without thinking twice about!
In order to draw such a player, we really only need two values: its X and Y coordinates every frame. These can be stored in our game_state so that the player's state is preserved.
struct game_state
{
    int ToneHz;
    int XOffset;
    int YOffset;

    f32 tSine;
        int PlayerX;
    int PlayerY;};
Our player should start at some point. It will be a completely arbitrary point, let's say (100,100). We'll throw it in together with the rest of the game_state initialization code.
if(!Memory->IsInitialized)
{
    // ...
    GameState->ToneHz = 256;
        GameState->PlayerX = 100;
    GameState->PlayerY = 100;
    Memory->IsInitialized = true;
}To control the player, we'll use the values of our Controllers. Input from the X axis of the stick will translate directly into the player's X coordinate, while the Y axis should be inverted first (because otherwise player would go in the opposite sense). We'll also multiply both values by 4 so that the movement is a bit faster.
for (int ControllerIndex = 0;
     ControllerIndex < ArrayCount(Input->Controllers);
     ++ControllerIndex)
{
    // ...

    if(Controller->ActionDown.EndedDown)
    {
        GameState->YOffset += 1;
    }
        GameState->PlayerX += (int)(4.0f * Controller->StickAverageX);
GameState->PlayerY -= (int)(4.0f * Controller->StickAverageY);}As of right now, player is just that: two numbers inside the game's data. We don't have anything to visualize it with just yet, no red hat or green shield, so let's just make it happen! We'll add a simple rendering code.
We can imagine that, in order to render our player, we'll need to loop over several pixels vertically and several pixels horizontally and paint each pixel of a different color.
We'll call this code immediately after drawing our gradient (not before because otherwise it will be overwritten!).
internal void
RenderWeirdGradient(game_offscreen_buffer *Buffer, int XOffset, int YOffset)
{
    // ...
}
internal void
RenderPlayer(game_offscreen_buffer *Buffer, int PlayerX, int PlayerY)
{
    for (int X = Left;
         X < Right;
         ++X)
    {
        for (int Y = Top;
             Y < Bottom;
             ++Y)
        {
           // Paint the pixel at the X, Y coordinates
        }
    }
}
GAME_UPDATE_AND_RENDER(GameUpdateAndRender)
{
// ... RenderWeirdGradient(Buffer, GameState->XOffset, GameState->YOffset); RenderPlayer(Buffer, GameState->PlayerX, GameState->PlayerY);}So, what do we need to render our player? We're essentially drawing a single-tinted square, soo...
- We need a color, let's say white. White has RGBA value of 255, 255, 255, 255, i.e.
0xFFFFFFFFin hexadecimal. - We need to calculate the top, bottom, left, and right margins of our square.
- Left is, very simply, whatever our
PlayerXposition is. - Top is, accordingly,
PlayerY. - Right is calculated from
PlayerX. Let's say we have a square with 10 pixel side, so right will bePlayerX + 10. - Bottom is calculated by taking
PlayerYand adding 10 to it.
- Left is, very simply, whatever our
u32 Color = 0xFFFFFFFF;

int Left = PlayerX;
int Right = PlayerX + 10;

int Top = PlayerY;
int Bottom = PlayerY + 10;
for (int X = Left;
        X < Right;
        ++X)
{
    for (int Y = Top;
            Y < Bottom;
            ++Y)
    {
        // Paint the pixel at the X, Y coordinates
    }
}
Now comes the tricky part: Finding these pixels inside our buffer memory. Unlike in RenderWeirdGradient, we don't want to repaint the whole buffer, we only want to edit memory in that specific 10×10 area. That means that, each time we go on a new iteration of the X loop, we recalculate our Pixel position from scratch as follows:
- We take the pointer to buffer memory as the base (pixel (0, 0)). We'll take the memory on a byte-by-byte basis (counting 1-byte long
u8s) to simplify the math. - We add to it our X position. We'll need to multiply it by bytes per pixel to get the correct offset.
- Finally, we move down to the top which is calculated by multiplying our
Topvalue by buffer'sPitch. As a reminder, pitch contains all the bytes of a single row.
When we are iterating on Y values, we'll simply paint the pixel and then move down by Pitch until we reach Bottom.
for (int X = Left;
        X < Right;
        ++X)
{    u8 *Pixel = ((u8 *)Buffer->Memory +
                 X * Buffer->BytesPerPixel +
                 Top * Buffer->Pitch);    for (int Y = Top;
            Y < Bottom;
            ++Y)
    {        *(u32 *)Pixel = Color;
        Pixel += Buffer->Pitch;    }
}
There's just one small problem with this. Currently, we don't store BytesPerPixel as a part of game_offscreen_buffer structure. But it's a very quick fix that we can add in right away:
struct game_offscreen_buffer
{
    void *Memory;
    int Width;
    int Height;
    int Pitch;    int BytesPerPixel;};
We can simply initialize BytesPerPixel from the platform backbuffer's BytesPerPixel (because we already store it there):
game_offscreen_buffer Buffer = {};
Buffer.Memory = GlobalBackbuffer.Memory;
Buffer.Width = GlobalBackbuffer.Width;
Buffer.Height = GlobalBackbuffer.Height;
Buffer.Pitch = GlobalBackbuffer.Pitch;Buffer.BytesPerPixel = GlobalBackbuffer.BytesPerPixel;Game.UpdateAndRender(&GameMemory, NewInput, &Buffer);Great! Now we can compile and have a player to control.
Win32ProcessPendingMessages(NewKeyboardController);

if (!GlobalPause)
{    if (NewKeyboardController->MoveUp.EndedDown)
    {
        NewKeyboardController->StickAverageY = 1.0f;
    }
    if (NewKeyboardController->MoveDown.EndedDown)
    {
        NewKeyboardController->StickAverageY = -1.0f;
    }
    if (NewKeyboardController->MoveLeft.EndedDown)
    {
        NewKeyboardController->StickAverageX = -1.0f;
    }
    if (NewKeyboardController->MoveRight.EndedDown)
    {
        NewKeyboardController->StickAverageX = 1.0f;
    }
    DWORD MaxControllerCount = XUSER_MAX_COUNT;
    if(MaxControllerCount > (ArrayCount(NewInput->Controllers) - 1))
    {
        MaxControllerCount = (ArrayCount(NewInput->Controllers) - 1);
    }

    // ...
}
One last thing, we'll crash any time we hit the top or the bottom of the screen: these pixels are simply out of reach. Let's quickly prevent it from happening. We'll need to calculate the end of buffer value and make sure that the pixel we're accessing is never at the end of buffer or before the beginning of the memory.
u8 *EndOfBuffer = (u8 *)Buffer->Memory +
                        Buffer->Pitch * Buffer->Height;u32 Color = 0xFFFFFFFF;
int Top = PlayerY;
int Bottom = PlayerY + 10;
for (int X = PlayerX;
        X < PlayerX + 10;
        ++X)
{
    u8 *Pixel = ((u8 *)Buffer->Memory +
                    X * Buffer->BytesPerPixel +
                    Top * Buffer->Pitch);
    for (int Y = Top;
            Y < Bottom;
            ++Y)
    {        if ((Pixel >= Buffer->Memory) &&
            (Pixel < EndOfBuffer))
        {            *(u32 *)Pixel = Color;
            Pixel += Buffer->Pitch;        }    }
}Adding Jumping
One last thing before we arrive to the topic of the day.
Let's assume that our “character” jumps whenever we hit ActionDown button (arrow down on keyboard). We currently use this button to control the YOffset, so let's repurpose it.
if(Controller->ActionDown.EndedDown)
{
    GameState->YOffset += 1;
}GameState->PlayerX += (int)(4.0f * Controller->StickAverageX);
GameState->PlayerY -= (int)(4.0f * Controller->StickAverageY);if(Controller->ActionDown.EndedDown)
{
    GameState->PlayerY -= 10;
}
Ok, this isn't good, like it's not even “terrible”, it's completely unusable. Our character won't even fall down! Maybe that's too much. We can very quickly hack in a simple jumping code based on a sine wave. We'll need to add another persistent element to our GameState. This element will track the current state of the jump:
struct game_state
{
    int ToneHz;
    int XOffset;
    int YOffset;

    f32 tSine;

    int PlayerX;
    int PlayerY;    f32 tJump;};
Now we can implement the jumping logic. After the initial impulse, tJump's value will gradually decrease every frame. We'll then pass this value through the sine function which will determine the desired offset.
GameState->PlayerY -= (int)(4.0f * Controller->StickAverageY + 10.0f * sinf(GameState->tJump));if(Controller->ActionDown.EndedDown)
{ GameState->tJump = 1.0;}GameState->tJump -= 0.033f;Define the Objective
The Problem
Now this player code still has flaws. There's nothing stopping us from having a new jump while we're “in the air”; besides, our character still doesn't fall down. (And you never, ever, should base your character movement on sine waves).
So let's say we want to go in and fine-tune our jumping algorithm. We already have tools which allow us to leave the game running, we can go back to the code saying “we will only modify tJump if it's above 0":
GameState->PlayerY -= (int)(4.0f * Controller->StickAverageY);if (GameState->tJump > 0)
{
    GameState->PlayerY += (int)(10.0f * sinf(GameState->tJump));
}if(Controller->ActionDown.EndedDown)
{
    GameState->tJump = 1.0;
}
GameState->tJump -= 0.033f;For instance, after the previous edit we can see that now the “jump” happens downwards instead of upwards (because of the phase of the sine wave). So we flip back to the editor, flip the sign, recompile, go back to the game and retest:
if (GameState->tJump > 0)
{ GameState->PlayerY -= (int)(10.0f * sinf(GameState->tJump));}Hopefully you can see where we're getting at: there's a whole process that we need to keep repeating for testing our changes: and it's just a simple jump tuning! Yet we still need to think about falling down, the amplitude, etc.
Fine-tuning is a potentially a complex and lengthy process, and we want to make it as smooth as possible. In our case, we already can leave the game running, recompile on the fly and continue editing, yet we still need to pick up our controller again and do the jump to test. This is how it looks now:
- Go into the game, find out what you need to tune.
- Implement the change in your code
- Recompile.
- Switch back to the game.
- Repeat the action to see whether it was fixed.
Picking up the controller and pressing a couple buttons may be tedious enough, but in a grand scheme of things it's a trivial situation. Imagine that you have to fine-tune something you can't easily replicate in one go, say, death animation of an enemy. You kill the enemy, and now he's gone, so you need to wait for him to respawn, or spawn a new one, or go find a new enemy... These are all the annoyances that you need to think about...
Do It Like the Musicians Do
Why not do it the way the musicians edit their music? Any serious music writing software allows you to write the notes, which will then be automatically reproduced for you, potentially on a loop. You can then go in, implement a quick fix, and go out.
What we're thinking about is a sort of a looped editor, where one can go and record a specific situation: input, world state, everything. After that, the game would be repeating the same action again and again, allowing us to work on it in the meantime.
This might be a daunting idea to face but it turns out it's not that bad! The way we set up our game, implementing such a feature would be quite easy. Setting sound aside for a moment, we only have one function to call: GameUpdateAndRender. This function takes whatever the state of the game memory is, it takes the input from the user, and a buffer to draw its result in. That's it!
So what if we remember whatever our input was? We could then pass it back to the game, the way we did it. By walking down this road, you can imagine setting up a structure to store the input for us. Since we'd be recording input for potentially more than one frame, we'd have an “input stream” containing input events for each frame and an “input count” saying how many of those events did we record.
struct win32_recorded_input
{
    int InputCount;
    game_input *InputStream;
};Further still, we know how to read or write files, so we can even potentially preserve these states between sessions! In such case we won't even need any structures to hold additional information for us, we can access such a stream on the fly.
That is what we're going to do. We'll have all the input data stored in a separate file that, once requested, will be fed back to the game as if it were actual user input.
Implement Live Loop
Introduce the Platform State
To get ourselves started, let's define two simple numbers: a recording index and a playing index. These (for now) will serve as the triggers: if the recording index is not zero, we'll do the recording, if the playing index is not zero, we'll start the playback.
We can define these inside our WinMain as follows:
HDC DeviceContext = GetDC(Window);
int InputRecordingIndex = 0;
int InputPlayingIndex = 0;
// NOTE(casey): Sound test
Even further still, we could package these inside a structure. At this point, we can introduce a structure similar to game_state, a platform-specific struct where we can store all sorts of useful data. It will contain things that wouldn't make sense agglomerating elsewhere, and we can pass it around wherever we want. For Windows platform layer, we'll call this structure win32_state, but you can imagine us eventually having eventually linux_state, macos_state, etc.
Let's define this structure inside win32_handmade.h:
struct win32_recorded_input
{
    int InputCount;
    game_input *InputStream;
};
struct win32_state
{
    int InputRecordingIndex;
    int InputPlayingIndex;
};
#define WIN32_HANDMADE_H
#endif
This structure can then be initialized inside our WinMain on startup.
HDC DeviceContext = GetDC(Window);
win32_state Win32State = {};Win32State.InputRecordingIndex = 0;
Win32State.InputPlayingIndex = 0;
// NOTE(casey): Sound test
Having a single state struct allows us to pass its arguments with ease. In our case, we can send the indexes to the keyboard processing function. If the user presses a key, let's say L for “loop”, we can toggle the states as necessary. If we don't do anything, we start recording, if we're already recording, we will stop recording and start playback.
internal voidWin32ProcessPendingMessages(win32_state *State, game_controller_input *KeyboardController){
    // ...
#if HANDMADE_INTERNAL
    else if (VKCode == 'P')
    {
        if (IsDown)
        {
            GlobalPause = !GlobalPause;
        }
    }    else if (VKCode == 'L')
    {
        if (IsDown)
        {
            if (State->InputRecordingIndex == 0)
            {
                State->InputRecordingIndex = 1;
            }
            else
            {
                State->InputRecordingIndex = 0;
                State->InputPlayingIndex = 1;
            }
        }
    }#endif
    // ...
}

int CALLBACK
WinMain(...)
{
    // ...
    *NewKeyboardController = {};
    NewKeyboardController->IsConnected = true;
    NewKeyboardController->IsAnalog = false;
    for (...)
    {
        // ...
    }
        Win32ProcessPendingMessages(&Win32State, NewKeyboardController);    // ...
}Outline Usage
Now that we can get from the user the commands to start looped recording or playback, let's think about how we can actually make it happen.
Supposedly, just before the Game.UpdateAndRender() call we introduce a couple functions that operate on the following logic:
- If the recording index has any value but 0, we start recording.
- If the playing index has any value but 0, we do the playback.
These functions would get the platform state and the user's input. For recording, the input would be stored on an external file. For the playback, whatever user's input was will be flat-out replaced by the saved version.
In code, this will look roughly this way:
game_offscreen_buffer Buffer = {};
Buffer.Memory = GlobalBackbuffer.Memory;
Buffer.Width = GlobalBackbuffer.Width;
Buffer.Height = GlobalBackbuffer.Height;
Buffer.Pitch = GlobalBackbuffer.Pitch;
Buffer.BytesPerPixel = GlobalBackbuffer.BytesPerPixel;
if (Win32State.InputRecordingIndex)
{
    Win32RecordInput(&Win32State, NewInput);
}
if (Win32State.InputPlayingIndex)
{
    Win32PlaybackInput(&Win32State, NewInput);
}Game.UpdateAndRender(&GameMemory, NewInput, &Buffer);Well, the only thing remaining now is dive in and actually make it happen.
Input Recording
As we said, we want to save user input on disk. If we look at the DEBUGPlatformWriteEntireFile function, you'll notice that, roughly said, a write process happens in three steps:
- File handle is opened for given filename.
- Data is written.
- File handle is closed.
That said, we don't have to open and close the file right ahead. Furthermore, every subsequent write will add data after whatever we've written before while the handle is open. All of this is awfully convenient for our purposes, so what we really need is to split input recording into three functions:
- Opening file for writing, which is called at the beginning of the recording (when the user presses
Lfor the first time). - Writing input, which is happening every frame.
- Closing the file (when the user presses
Lfor the second time).
Let's start from the simplest one: Writing input. Provided a file handle, we simply write our input to it and call it a day. We won't even check if the file handle is valid, since it's all debug code.
This is how the output function looks like:
internal void
Win32RecordInput(win32_state *State, game_input *Input)
{
    DWORD BytesWritten;
    WriteFile(State->RecordingHandle, Input, sizeof(*Input), &BytesWritten, 0);
}
internal void
Win32ProcessPendingMessages(...)And that's all there's to the actual recording. WriteFile takes five parameters:
- Handle to the file. We don't have
RecordingHandlejust yet, we'll get there in a second. - Pointer to the data to write. It's our whole
Inputstruct. - How much data to write. It's simple in our case, we want to copy the whole struct so we use
sizeofoperator. - Pointer to
BytesWrittenvariable.WriteFilewill outputTRUEorFALSEdepending on whether the operation succeeded at all. It's the programmer's responsibility then to check if theBytesWrittencorresponds to the size since writing less than requested is not considered a fail case. Not in our case, we don't care, it's all internal debug code. - Final value only comes into play in case of asynchronous writing. It's not our case so we simply pass
NULLor0.
So from all of this we are only missing our file handle. Let's first add it to win32_state. While we're at it, let's also add the PlaybackHandle which will become handy for playback.
struct win32_state
{
    HANDLE RecordingHandle;
    int InputRecordingIndex;

    HANDLE PlaybackHandle;
    int InputPlayingIndex;
};
To open and close the recording file handle, we can simply reuse the code we have already. We don't care about the file name for now, let's have it as foo.hmi, .hmi standing for “Handmade Input`.
Another thing that we'll do is to delegate setting of the recording index to these functions. This is less error-prone, and will come in handy when we will use these functions.
internal void
Win32BeginRecordingInput(win32_state *State, int InputRecordingIndex)
{
    State->InputRecordingIndex = InputRecordingIndex;

    char *Filename = "foo.hmi";
    State->RecordingHandle =
                CreateFileA(Filename, GENERIC_WRITE, 0, 0, CREATE_ALWAYS, 0, 0);
}

internal void
Win32EndRecordingInput(win32_state *State)
{
    CloseHandle(State->RecordingHandle);
    State->InputRecordingIndex = 0;
}
internal void
Win32RecordInput(...)
// ...
At this point, we can replace the code we've written before inside Win32ProcessPendingMessages and, instead of defining indexes ourselves, call the newly defined functions.
else if (VKCode == 'L')
{
    if (IsDown)
    {
        if (State->InputRecordingIndex == 0)
        {            Win32BeginRecordingInput(Win32State, 1);        }
        else
        {            Win32EndRecordingInput(Win32State);
            Win32BeginInputPlayback(Win32State, 1);        }
    }
}
We don't have Win32BeginInputPlayback just yet, so let's make it happen right away!
Input Playback
For what it might concern the playback (or PlayBack if you prefer it), we will mostly mirror the same setup:
- A function will open a playback handle for reading.
- Another function will do the read on each frame.
- Yet another function will close the handle once we're done.
We have already added PlaybackHandle to win32_state anticipating this movement, let's go ahead and write the rest of code.
Functions for begin and end playback should be fairly straightforward. We will set the InputPlaybackIndex, open or close the file handle as necessary.
internal void
Win32RecordInput(...)
{
    // ...
}
internal void
Win32BeginInputPlayback(win32_state *State, int InputPlaybackIndex)
{
    State->InputPlaybackIndex = InputPlaybackIndex;

    char *Filename = "foo.hmi";
    State->PlaybackHandle = CreateFileA(Filename, GENERIC_READ, FILE_SHARE_READ, 0, OPEN_EXISTING, 0, 0);
}

internal void
Win32EndInputPlayback(win32_state *State)
{
    CloseHandle(State->PlaybackHandle);
    State->InputPlayingIndex = 0;
}

internal void
Win32PlaybackInput(win32_state *State, game_input *Input)
{

}
As for Win32PlaybackInput, there's more complexity involved. The simplest solution is:
- Try to read the first input.
- If it succeeds (we do need to make sure that the read was successful), stop and restart right away.
internal void
Win32PlaybackInput(win32_state *State, game_input *Input)
{    DWORD BytesRead;
    if (ReadFile(State->PlaybackHandle, Input, sizeof (*Input), &BytesRead, 0))
    {
        int PlayingIndex = State->InputPlayingIndex;
        Win32EndInputPlayback(Win32State);
        Win32BeginInputPlayback(Win32State, PlayingIndex);
    }}
This is a valid solution if we only need to register a single frame's Input event. However this is not the case; we want to read the whole recorded sequence. What we really need is this logic:
- If the read succeeded, all good, there will be still input on the next iteration.
- If the read failed, we reached the end of file stream, need to restart.
DWORD BytesRead;
if (ReadFile(State->PlaybackHandle, Input, sizeof (*Input), &BytesRead, 0))
{    // NOTE(casey): There's still input
}
else
{
    // NOTE(casey): We've hit the end of the stream, go back to the beginning    int PlayingIndex = State->InputPlayingIndex;
    Win32EndInputPlayback(Win32State);
    Win32BeginInputPlayback(Win32State, PlayingIndex);
}Let's compile, run, and see in the debugger what's going on.
- At the beginning of
WinMain,Win32Stateis reset successfully. - When we press
L, and the recording starts:InputRecordingIndexis changed to1, and theRecordingHandleis not0. - You can run around with your player, do a couple jumps.
- Once you press
Lagain, you'll see that the player repeats the whole sequence.
There's still one last bug lurking around. You'll notice that we don't loop properly. After the first playback loop is completed, it should return to the beginning and restart playback from scratch.
What's going on? Let's re-examine Win32PlaybackInput:
internal void
Win32PlaybackInput(win32_state *State, game_input *Input)
{
    DWORD BytesRead;
    if (ReadFile(State->PlaybackHandle, Input, sizeof (*Input), &BytesRead, 0))
    {
        // NOTE(casey): There's still input
    }
    else
    {
        // NOTE(casey): We've hit the end of the stream, go back to the beginning
        int PlayingIndex = State->InputPlayingIndex;
        Win32EndInputPlayback(Win32State);
        Win32BeginInputPlayback(Win32State, PlayingIndex);
    }
}
Ok, seems like we didn't check the documentation here. We are checking whether or not ReadFile returns 0. Our expectation was that 0 (or FALSE) would be returned if ReadFile read less 0 bytes. However, the documentation claims that the function only returns 0 if the read failed completely (for instance, if the file handle wasn't open) so it's not not our case.
We need to refactor this code to look at the bytes read instead. If we our BytesRead is 0, we'll restart from the beginning. We still want to see whether ReadFile succeeded, just to be sure.
While we're at it, we might also fix another inaccuracy: when we restart our read, we still want to read the first input in the sequence. Otherwise one frame would be skipped entirely, something that might cause unexpected troubles.
internal void
Win32PlaybackInput(win32_state *State, game_input *Input)
{
    DWORD BytesRead = 0;
    if(ReadFile(State->PlaybackHandle, Input, sizeof(*Input), &BytesRead, 0))
    {        // NOTE(casey): There's still input
    }
    else
    {        if(BytesRead == 0)
        {            // NOTE(casey): We've hit the end of the stream, go back to the beginning
            int PlayingIndex = State->InputPlayingIndex;
            Win32EndInputPlayback(Win32State);
            Win32BeginInputPlayback(Win32State, PlayingIndex);            ReadFile(State->PlaybackHandle, Input, sizeof(*Input), &BytesRead, 0);
        }    }
}Loop the Game State
There's one last piece of the puzzle missing. If we wanted to save the whole state of the game... guess what? We've architectured our code in the specific manner allowing this with ease. It's going to take a huge amount of space on your disk drive but it's doable!
As you remember, we VirtualAlloc'ed the entire memory block used by the game to the known base address (address to which the memory pointer is pointing to — the result of VirtualAlloc). So if we want to restore the state of the game at that time, we simply need to save and load that block. That's it. Just a couple lines of code, without the need of a full-blown serialization layer, big walking changes of things (to check what changed or not). Even further than that, having a known base address means that all the pointers within that memory block will remain valid!
So how exactly do we make it happen? You will be shocked how little of a change to our code is required.
First of all, let's move the references to our game memory to win32_state. It's only a single pointer and the size.
struct win32_state
{    u64 TotalSize;
    void *GameMemoryBlock;
    HANDLE RecordingHandle;
    int InputRecordingIndex;

    HANDLE PlaybackHandle;
    int InputPlayingIndex;
};
To use it, we simply move TotalStorageSize and GameMemoryBlock to Win32State. Make sure that the Win32State initialization is above GameMemory initialization inside your WinMain!
win32_state Win32State = {};

// ...

game_memory GameMemory = {};
GameMemory.PermanentStorageSize = Megabytes(64);
GameMemory.TransientStorageSize = Gigabytes(1);
GameMemory.DEBUGPlatformFreeFileMemory = DEBUGPlatformFreeFileMemory;
GameMemory.DEBUGPlatformReadEntireFile = DEBUGPlatformReadEntireFile;
GameMemory.DEBUGPlatformWriteEntireFile = DEBUGPlatformWriteEntireFile;
Win32State.TotalSize = (GameMemory.PermanentStorageSize + GameMemory.TransientStorageSize);
Win32State.GameMemoryBlock = VirtualAlloc(BaseAddress, (size_t)Win32State.TotalSize,                                            MEM_RESERVE | MEM_COMMIT, PAGE_READWRITE);
GameMemory.PermanentStorage = Win32State.GameMemoryBlock;GameMemory.TransientStorage = ((u8 *)GameMemory.PermanentStorage +
GameMemory.PermanentStorageSize);So far, there's no change to the output of our program. We simply moved the location of our game memory block to access it easier. Now let's actually make the change.
Inside Win32BeginRecordingIndex (which already has access to Win32State) we will attempt to write the whole GameMemoryBlock (i.e. whatever its TotalSize is).
We need to be careful about that because our GameMemoryBlock can eventually exceed 4GB of data (since we already request a bit more than 1GB), and WriteFile cannot write more than 4GB at a time. We can go around this issue for now by casting our TotalSize to a 32-bit DWORD and immediately assert that the resulting value is the same as TotalSize.
State->InputRecordingIndex = InputRecordingIndex;

char *Filename = "foo.hmi";
State->RecordingHandle = CreateFileA(Filename, GENERIC_WRITE, 0, 0, CREATE_ALWAYS, 0, 0);
DWORD BytesToWrite = (DWORD)State->TotalSize;
Assert(State->TotalSize == BytesToWrite);
DWORD BytesWritten;
WriteFile(State->RecordingHandle, State->GameMemoryBlock, BytesToWrite,
            &BytesWritten, 0);
Conversely, whenever we want to start our playback, we want to load whatever the game's state was. It looks exactly the same way as the recording, except we use ReadFile instead of WriteFile:
State->InputPlayingIndex = InputPlayingIndex;

char *Filename = "foo.hmi";
State->PlaybackHandle = CreateFileA(Filename, GENERIC_READ, FILE_SHARE_READ, 0, OPEN_EXISTING, 0, 0);
DWORD BytesToRead = (DWORD)State->TotalSize;
Assert(State->TotalSize == BytesToRead);
DWORD BytesRead;
ReadFile(State->PlaybackHandle, State->GameMemoryBlock, BytesToRead, &BytesRead, 0); That's it. That's really all there's to it. This is absolutely amazing. Isn't programming great?
Fix the “Jump” Code
Now you'll see how simple it is to edit code on the fly. To test our newfound ability, let's go back to our “totally accurate” jump code and try to fix it just a little bit. This is the state of it right now.
if (GameState->tJump > 0)
{
    GameState->PlayerY -= (int)(10.0f * sinf(GameState->tJump));
}
if(Controller->ActionDown.EndedDown)
{
    GameState->tJump = 1.0f;
}
GameState->tJump -= 0.033f;
The way we approach this will be the following:
- Run the game.
- Start recording (press
L) - Make the player run and do a single jump
- Stop recording (press
Lagain). The player should repeat the little run and jump ad infinitum, allowing you to:- Make the tweak
- Recompile the code (hopefully you have setup a keyboard shortcut to compile by now?)
- See the change
- Make the tweak....
Well, first of all, we'd like for the player to return down. If we continue by our current logic and use the sine function, we'd say that there should be Pi period involved.
GameState->PlayerY -= (int)(10.0f * sinf(Pi32 * GameState->tJump));Ok, that did nothing. Maybe we should do the full period, 2Pi?
GameState->PlayerY -= (int)(10.0f * sinf(2.0f * Pi32 * GameState->tJump));Now the “jump” works but in the opposite sense, because we're subtracting from player's position. Let's increase instead:
GameState->PlayerY += (int)(10.0f * sinf(2.0f * Pi32 * GameState->tJump));
Ok, this seems to work, let's increase the jump by 2.0f instead of 1.0f when we hit jump:
if (GameState->tJump > 0)
{    GameState->PlayerY += (int)(10.0f * sinf(Pi32 * GameState->tJump));}
if(Controller->ActionDown.EndedDown)
{    GameState->tJump = 2.0f;}
GameState->tJump -= 0.033f;
Maybe we want this jump to take a little bit longer.. then we'd increase tJump while lowering sine angle.
if (GameState->tJump > 0)
{    GameState->PlayerY += (int)(10.0f * sinf(0.5f * Pi32 * GameState->tJump));}
if(Controller->ActionDown.EndedDown)
{    GameState->tJump = 4.0f;}
GameState->tJump -= 0.033f;Yeah, this seems reasonable. Please don't use this jump implementation, that's not how you should do jumps.
Further Tweaks
As usual, you can make it so that the game helps you develop it even more.
Make Game Window Topmost
One of the tweaks is the possibility of setting up your window to be always on top by passing the flag WS_EX_TOPMOST when the window is created.
HWND Window = CreateWindowEx(WS_EX_TOPMOST,                             WindowClass.lpszClassName, "Handmade Hero",
                            WS_OVERLAPPEDWINDOW | WS_VISIBLE,
                            CW_USEDEFAULT, CW_USEDEFAULT,
                            CW_USEDEFAULT, CW_USEDEFAULT,
0, 0, Instance, 0);Make Game Window Semitransparent
Another cool trick is that you can even make the window semitransparent, so you can continue editing the code below.
One limitation of these so-called “layered” windows is that they cannot have an own or class device context. We do have Own DC but luckily we don't use it that much. We can easily get rid of it.
WNDCLASS WindowClass = {0};
WindowClass.style = CS_HREDRAW | CS_VREDRAW;WindowClass.lpfnWndProc = Win32MainWindowCallback;
WindowClass.hInstance = Instance;
// WindowClass.hIcon;
WindowClass.lpszClassName = "HandmadeHeroWindowClass";There's only one place we use a DC: when we're rendering our buffer. We can request one and release it then.
if (Window)
{    // NOTE(casey): Since we specified CS_OWNDC, we can just
    // get one device context and use it forever because we
    // are not sharing it with anyone.
    HDC DeviceContext = GetDC(Window);
    win32_state Win32State = {};
    Win32State.InputRecordingIndex = 0;
    Win32State.InputPlayingIndex = 0;

    // ...
    HDC DeviceContext = GetDC(Window);    Win32DisplayBufferInWindow(&GlobalBackbuffer, DeviceContext, Dimension.Width, Dimension.Height);    ReleaseDC(Window, DeviceContext);    // ...
}So far, we see no changes to the output of our program. But now we can actually implement a layered window. This is achieved in two steps. First, we need to declare that our window will be layered, we can do it when we create it:
HWND Window = CreateWindowEx(WS_EX_TOPMOST | WS_EX_LAYERED,                              WindowClass.lpszClassName, "Handmade Hero",
                             WS_OVERLAPPEDWINDOW | WS_VISIBLE,
                             CW_USEDEFAULT, CW_USEDEFAULT,
                             CW_USEDEFAULT, CW_USEDEFAULT,
0, 0, Instance, 0);Next, we need to configure how this layered-ness will be. This is achieved by calling the SetLayeredWindowAttributes function. We want our Window to be exactly semi-transparent.
SetLayeredWindowAttributes requires us to pass the following parameters:
- A handle to the window.
- Color key. This way you could make transparent, for example, only green or blue parts of the screen. We don't need this, so we'll specify black.
- Transparency level. This goes from 0—completely transparent to 255—completely opaque. Let's settle somewhere in between for now.
This function is better called by Windows directly. Whenever we receive WM_ACTIVATEAPP message, our MainWindowCallback will set the layered attributes.
case WM_ACTIVATEAPP:
{    SetLayeredWindowAttributes(Window, RGB(0, 0, 0), 128, LWA_ALPHA);} break;
Here, if we want to be extra fancy, we can check if the window is active or not. WParam is set to TRUE if the window is currently focused, and to FALSE if it's not. Let's leverage this knowledge to make our window completely opaque when we're focused on it:
case WM_ACTIVATEAPP:
{    if (WParam == TRUE)
    {
        SetLayeredWindowAttributes(Window, RGB(0, 0, 0), 255, LWA_ALPHA);
    }
    else
    {        SetLayeredWindowAttributes(Window, RGB(0, 0, 0), 64, LWA_ALPHA);    }
} break;If you'd like to read more about layered windows, head over to this quick guide or this, more extensive, article.
There's more to it, like allowing mouse click-through, but we'll get to it next time (or you can try and implement it yourself!).
Recap
What we did today cannot be praised enough. We've done input recording in no time and even have more time for extra fanciness. Yet there was an entire company dedicated to input recording once, and it's not something you see used a lot because it's deemed “too complex to implement”.
There's so much more to do to make our platform layer a better development environment. We could make an middle platform layer to make our tools cross-platform, we could continue adding special functionality... and one day we might. But so far, in the past 23 days, we focused only on the platform layer, and not at all on the game. So the next two days we'll dedicate to the final cleanups: fixing hidden bugs, moving things around, final testing.
Side Considerations
Disable Sound
If you want to disable sound, you can do it by simply setting the sample value to 0. You can hard-code it or, since we'd like to return to our sound code one last time in the future, we will #if 0 the exiting part out.
#if 0        f32 SineValue = sinf(GameState->tSine);
        s16 SampleValue = (s16)(SineValue * ToneVolume);#else
        s16 SampleValue = 0;
#endifNavigation
Previous: Day 22. Instantaneous Live Code Editing
Up Next: Day 24. Win32 Platform Layer Cleanup
- Base address
- Layered windows